From Design to Finished Product:
What Does Modern Automated SMD/SMT Assembly Look Like?
Imagine that building electronics is like putting together incredibly precise LEGO bricks, except instead of hands, we use advanced robots, and the components are sometimes smaller than a poppy seed. We call this process SMT assembly – Surface Mount Technology – which allows us to “print” sophisticated circuits directly onto a printed circuit board. It might sound mysterious, but in practice, it is precisely this method that makes your product idea repeatable, cost-effective in mass production, and, above all, reliable. I’ll gladly guide you through this world and show you that introducing electronics into your product lineup is much simpler than it might seem at first glance.
Step One: Preparing the “Foundation” – Applying Solder Paste
Before a single component appears on the board, we must prepare the right base for it – it’s a bit like laying mortar under bricks to ensure the structure is stable. To do this, we use a special paste, which is a blend of flux and microscopic solder alloy spheres (most often modern, lead-free compositions).
This process takes place in a machine called a stencil printer. Using a metal stencil with precisely cut apertures, we squeeze the paste exactly where the component contact pads are meant to be. This ensures that every single pad receives the ideal amount of solder alloy, which is critical to preventing open circuits and ensuring the finished device runs trouble-free for years. After passing through the oven, it is this alloy that will form a durable and reliable electrical connection.
Step Two: The Heart of the Production Line – Pick&Place Machines
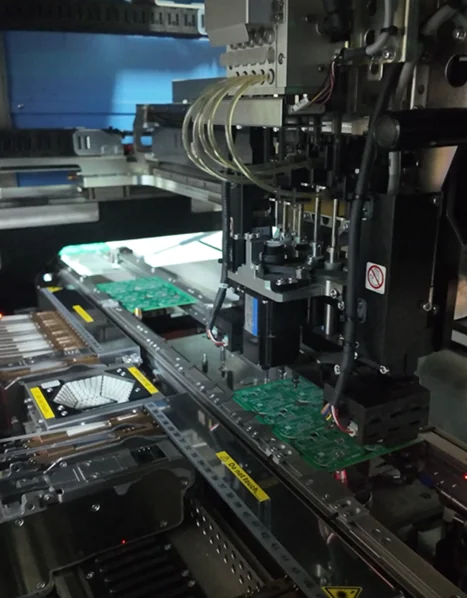
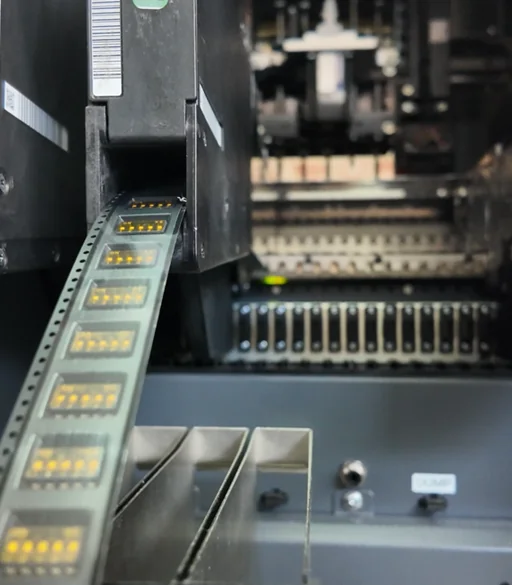
Once our board has the solder paste applied, it moves to the most spectacular machine on the entire factory floor: the pick&place machine. This is an incredibly fast robot equipped with vision systems and vacuum nozzles that selects the correct components from feeders at lightning speed and places them onto the board with surgical precision.
The machine “sees” every single component and corrects its alignment in a fraction of a second so that it lands perfectly on its designated spot on the solder paste. For you as an entrepreneur, this is a crucial moment because this automation eliminates the risk of human error – the robot doesn’t get tired, its hand doesn’t shake, and it always places the exact same resistor or processor precisely where the designer intended. As a result, your product is completely repeatable, and you can rest assured that the 100th and 1,000th units will be crafted identically to the first golden unit.
Step Three: “Baking” the Electronics – The Reflow Oven
When all the components are sitting in their places, they resemble building blocks placed on thick modeling clay – they are stable enough not to fall off, but the connection is not yet permanent or electrically conductive. To change that, the board enters a long tunnel called a reflow oven. Inside, a precisely controlled temperature profile gradually rises until the solder paste melts into liquid metal, permanently bonding the component leads to the board.
The whole process resembles baking a cake professionally: the temperature must be perfectly dialed in so that the solder reflows, yet the delicate integrated circuits do not overheat. As the board leaves the oven and cools down, the liquid metal solidifies, creating solid, reliable joints that will withstand shocks and the harsh operating conditions of your device. Thanks to this stage, your product transforms from a loose collection of parts into a single, cohesive, and ready-to-run electronic circuit.
Step Four: The Digital Eye – AOI Quality Control
When our board exits the oven, it looks finished at first glance, but in professional manufacturing, we leave nothing to chance. This is where AOI (Automated Optical Inspection) comes into play. Imagine a state-of-the-art scanner equipped with multiple high-resolution cameras that analyzes the board from various angles. In a fraction of a second, this system compares your product against a golden template and verifies whether every part is perfectly straight and all joints are correctly formed. It is a lightning-fast filter that catches the tiniest defects before shipment.
Step Four: The Digital Eye – AOI Quality Control
When our board exits the oven, it looks finished at first glance, but in professional manufacturing, we leave nothing to chance. This is where AOI (Automated Optical Inspection) comes into play. Imagine a state-of-the-art scanner equipped with multiple high-resolution cameras that analyzes the board from various angles. In a fraction of a second, this system compares your product against a golden template and verifies whether every part is perfectly straight and all joints are correctly formed. It is a lightning-fast filter that catches the tiniest defects before shipment.
SUMMARY
As you can see, modern electronics manufacturing is a fascinating dance of precision machines where nothing is left to chance. From the first drop of solder paste, through the lightning-fast movements of the robots placing components, to the sharp gaze of the digital quality control eye – every step has one goal: to deliver a product that simply works and that you can rely on. Introducing electronics to your portfolio is not just a step toward modernization; above all, it brings real added value for your customers and a competitive edge over rivals who are still hesitating to innovate.
You don’t need to be an expert on microscopic circuits to create a breakthrough solution – you just need the vision, and we will handle the rest. We are here to lift the weight of technical complexities off your shoulders and guide you through the manufacturing process smoothly and stress-free.
Want to see your idea take real shape?
Explore our electronics assembly and manufacturing services and see how easily we can build your next market success together.
Frequently Asked Questions (FAQ) – Electronics Manufacturing
1. Is automated assembly cost-effective for small product batches?
Yes. Modern SMT lines are increasingly flexible. While manual assembly is often used for a handful of prototype units, an automated line provides significantly higher quality and repeatability for runs of dozens or hundreds of units. In the long run, this drives down the costs associated with potential warranty claims and rework.
2. What is the difference between SMD and SMT?
Although these acronyms are often used interchangeably, they mean different things. SMD (Surface Mount Device) refers to the components themselves – the physical parts placed on the board. SMT (Surface Mount Technology) is the name of the entire process and technology used to assemble those parts. You could say that SMT is the method of building with SMD blocks.
3. What do I need to provide to the assembly firm to start production?
To set up the automated machinery, three main things are required: the design files (gerber files), the component list (BOM – Bill of Materials), and the coordinate file (Pick&Place file), which tells the machine exactly where to place each component. If you don’t have these files, a good manufacturing partner will help you prepare them based on your project.
4. Is SMT assembly durable and resilient to damage?
Absolutely. Thanks to the precise dispensing of paste in the stencil printer and the controlled profile inside the reflow oven, the joints are incredibly solid. In reality, automated assembly is far more resilient to shocks and vibrations than traditional hand soldering, which is critical for consumer and automotive products alike.